
Azure DevOps is a SaaS solution for your git repositories, wikis, artifact repository and more. One part of it is Azure Pipelines, for your CI/CD pipelines. We will show you how can quickly build your first pipeline with Azure DevOps.
Azure Pipelines is a part of Azure DevOps with which you can create CI and CD pipelines via YAML. You can do that by creating a YAML file in your git repository. Oftentimes that file is called azure-pipelines.yml through convention. You can create as many pipelines in a repository as you want. You can for example create two files: azure-pipelines-ci.yml and an azure-pipelines-cd.yml. After that, you can create two new pipelines pointing to those YML files in your git repository. Azure Pipelines then picks up that file, parses it and creates a pipeline.
Your first pipeline
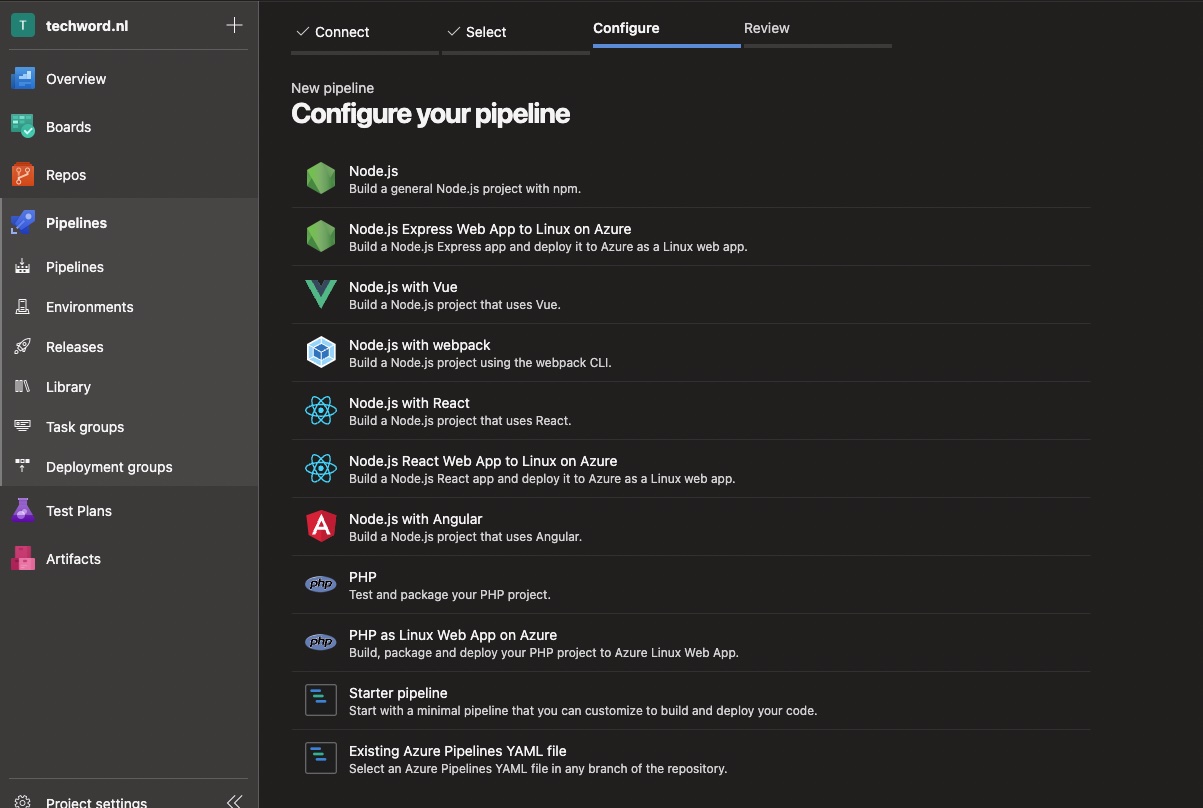
Let’s get to work and create our first Azure Pipeline. To get started, log-in to Azure DevOps and click on the left menu on Pipelines and choose New. You can now choose where your code lives. This can be in Azure Repos, but also in GitHub, Bitbucket Cloud or any other Git server that Azure DevOps can reach. Choose your repository and then choose a template. There are templates for all different kind of projects, such as Node.js, Python, Java and .NET. If you want to start with a clean slate, choose the Starter pipeline. If you already have an existing YML file for a pipeline, choose Existing Azure Pipelines YML file.
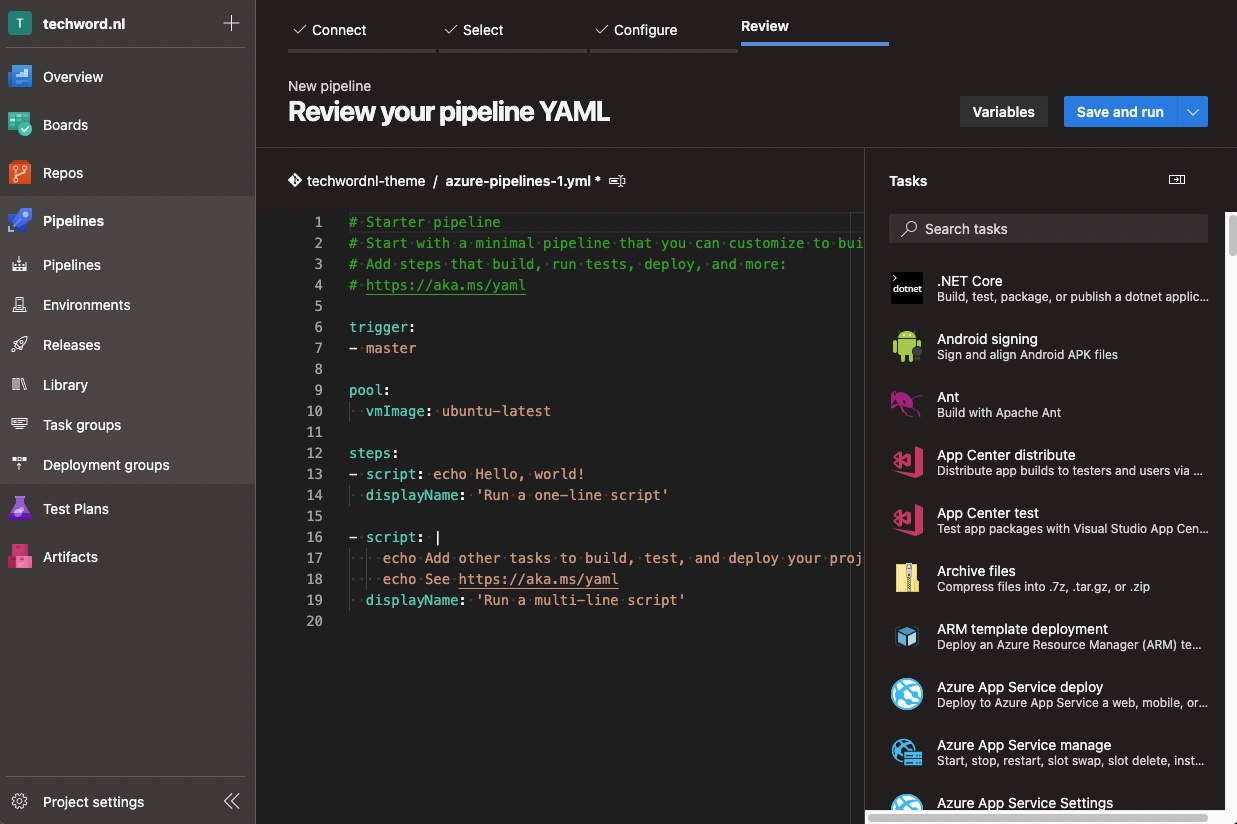
We will create a completely new and empty pipeline. So choose that option. You will then see a YML text file editor with code for a trigger, a list of branches for which a build will start, a pool on which our build will run and the steps of the pipeline. Below the steps property you can create your pipeline. Click on Show assistant on the right to see what kind of steps you can add. Here you will find all kinds of build tools and runtimes, such as Maven, Visual Studio Build, Python, Node, but also simply bash, a step to list folders in a directory, PowerShell and more.
If you miss steps, you can go to the Azure DevOps marketplace to install extensions that add more functionality to Azure Pipelines. Here you can find AWS Toolkit, Cloud Foundry, SonarQube and more steps.
Each step you add has its own set of unique attributes with which you can configure it. But Pipelines also has a set of built-in attributes that are the same for each step. An example of such an attribute is displayName, with which you can give your step a clear name to be shown in the UI. We also have the condition property that you can use to conditionally run a step. You can find the exact syntax for that in the Azure Pipelines docs, but if you want to run a step for example only on the main branch of your project, then that looks like this:
condition: eq(variables['Build.SourceBranch'], 'refs/heads/main')
Also, it is important to know that you can use variables within Azure Pipelines. By default there are a set of variables built-in. You can find the complete list here. You can also create variables yourself, by defining these at the top of the pipeline like so:
variables:
  - name: myVariable
    value: valueOfVariable
To define secret variables, you can click in the pipeline editor on the button Variables and add one. Select the option Keep this value secret to actually keep it secret. You can then use the variable via $(mySecretVariable). Furthermore, you can define variable groups, useful for when you have a lot of secrets, or get secrets from Azure KeyVaults. For that, check out this page.
With parameters you can have input variables that have to be set before a run starts.
Stages and jobs
When your pipeline grows with a lot of steps, it can quickly become quite difficult to maintain an overview. To change that, you can divide your steps over jobs and your jobs over a set of stages. A stage can be, for example, build this app, run the integration tests or release this app to production. A job is a collection of steps, for example a job that runs all unit tests and one that runs all integration tests. You can also use conditions for jobs and stages.
You don’t have to use jobs or stages in your YML file, just having steps will work just fine. Azure Pipelines then creates an implicit stage and job automatically. The advantage of jobs and stages, besides the better overview, is that you can run them in parallel on different agents. All steps in a job will be executed on the same agent. Furthermore, using jobs and stages increases re-usability of your pipeline via templating.
You can exchange information between stages. It is possible to define a variable in one stage and then use it in another (the syntax to do it, however, is horrible). The same goes for artifacts and files, and of course you can also do this for jobs.
Stages can be dependent on different stages and jobs on different jobs. By default a stage is dependent upon the previous stage. If you add the following to your stage dependsOn: [] then you remove that implicit dependency on the previous stage and it will run immediately. You can also add different stages to this list, and achieve stages executing in parallel.
Pipelines vs Releases
Azure DevOps has two somewhat similar sections, one called Pipelines and another Releases. Pipelines are the newer version, Releases are pretty much deprecated. The difference between both is that Releases is only meant for releasing your application and that you build this pipeline via a GUI. It cannot be stored under version control. Pipelines is meant for both CI and CD, and you can build your pipeline in YML and place it under version control. This makes a pipeline created in Pipelines much more suitable for modern DevOps workflows, where the infra itself is also under version control and changes are reviewed by team members.
Microsoft doesn’t release new features for Releases anymore. Most development is happening for Azure Pipelines.
Tip: Use the code editor from Azure Pipelines
When you edit a YML file from Azure Pipelines, we recommend to use the built-in editor from Azure Pipelines. You can find this editor by clicking on the three dots on the top right above a pipeline and then click on Edit. By using this editor, you get syntax highlighting, auto-completion and validation of the Azure Pipelines YML. To validate a YML file while in the editor, click on the top right on the three dots and choose Validate. This way you ensure that what you right can actually be understood and executed by Azure Pipelines.
Pipeline artifacts & triggers
In Azure Pipelines you have the option to store a built artifact in your pipeline. To do this, you must use the task Publish Pipeline Artifact. In this task, you can indicate in which folder the artifact should be stored and how it should be named.
Suppose you want to create a separate deployment pipeline, you can then download the artifact from your CI pipeline by using the Download Artifact step. For the option artifactName you can then fill in the same name as you’ve used for the publish step.
All we want now is that our release pipeline is triggered automatically after a successful run of our CI pipeline. To achieve this, we need to add our CI pipeline as a resource and set the trigger property on it to true. You can see here what that looks like exactly.
4-eyes principle
For many organizations it is important that a single individual cannot just put something into production without review. You have multiple ways of setting the 4-eyes principle up in Azure DevOps. For example, for each pull request to master or main you can force that multiple approvals are required. Also, in a release pipeline you can set that an approval is needed, although enabling that is not so straightforward.
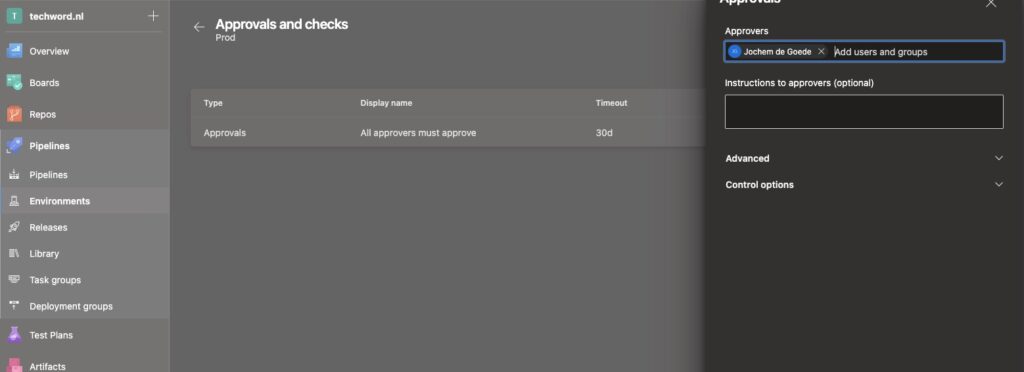
To add such a step to Azure Pipelines, you first have to create an Environment (via the menu on the left, below Pipelines). We call our new environment Prod. For Resource choose None. You can then add an approval to this environment via the top right by clicking on the three dots and choosing Approvals and checks. Add users or groups that should approve a deployment to this environment. Note that for a group you can only choose to have a single individual approve or the whole group. If that is not what you want, you’re better off adding people individually and setting the number of approvals to 2. Make sure that you’ve disabled the option to approve own runs. Click Create to create the new check.
Now you can use your environment in the pipeline as follows:
- stage: deploy
  jobs:
  - deployment: DeployWeb
    displayName: deploy Web App
    environment: 'Prod'
    strategy:
      runOnce:
        deploy:
          steps:
            - script: echo Hello world
            ... the rest of your deploy steps ...
You can see here we’ve created a job with a set of properties. It is outside the scope of this article to dive deeper into these properties, but you can find the docs about them here. The most important thing to know is that we are registering a deployment on the Environment called Prod via the strategy/runOnce/deploy properties. This way our approvals and checks are loaded for this environment and we have to approve a deployment.
We can now also track deployments to this environment via the interface of Azure DevOps. If you want to read more about that, check out this article.
Conclusion
We’ve shown you how you can build your first Azure Pipeline and how you can add more steps from the Marketplace. You’ve also seen how you can add conditions to your steps and how you can publish and consume artifacts in your pipelines. For a real production pipeline, you will probably need some sort of 4-eyes principle. Setting that up requires some knowledge, but it is definitely possible.
There is of course a lot that we didn’t cover, such as triggers, templates and more, let alone all the fun stuff you can do via the Azure DevOps CLI, but for now you have enough to get started and start building pipelines in Azure DevOps.